[ad_1]
Baking bread at house is one in every of my favorite issues to take action here is a bread baking 101! I really like the entire course of – getting the elements, kneading the dough, watching it rise, shaping it after which lastly baking it. And the scent of freshly baked bread – nothing can beat that. Listed below are a couple of ideas for once you bake bread the subsequent time!
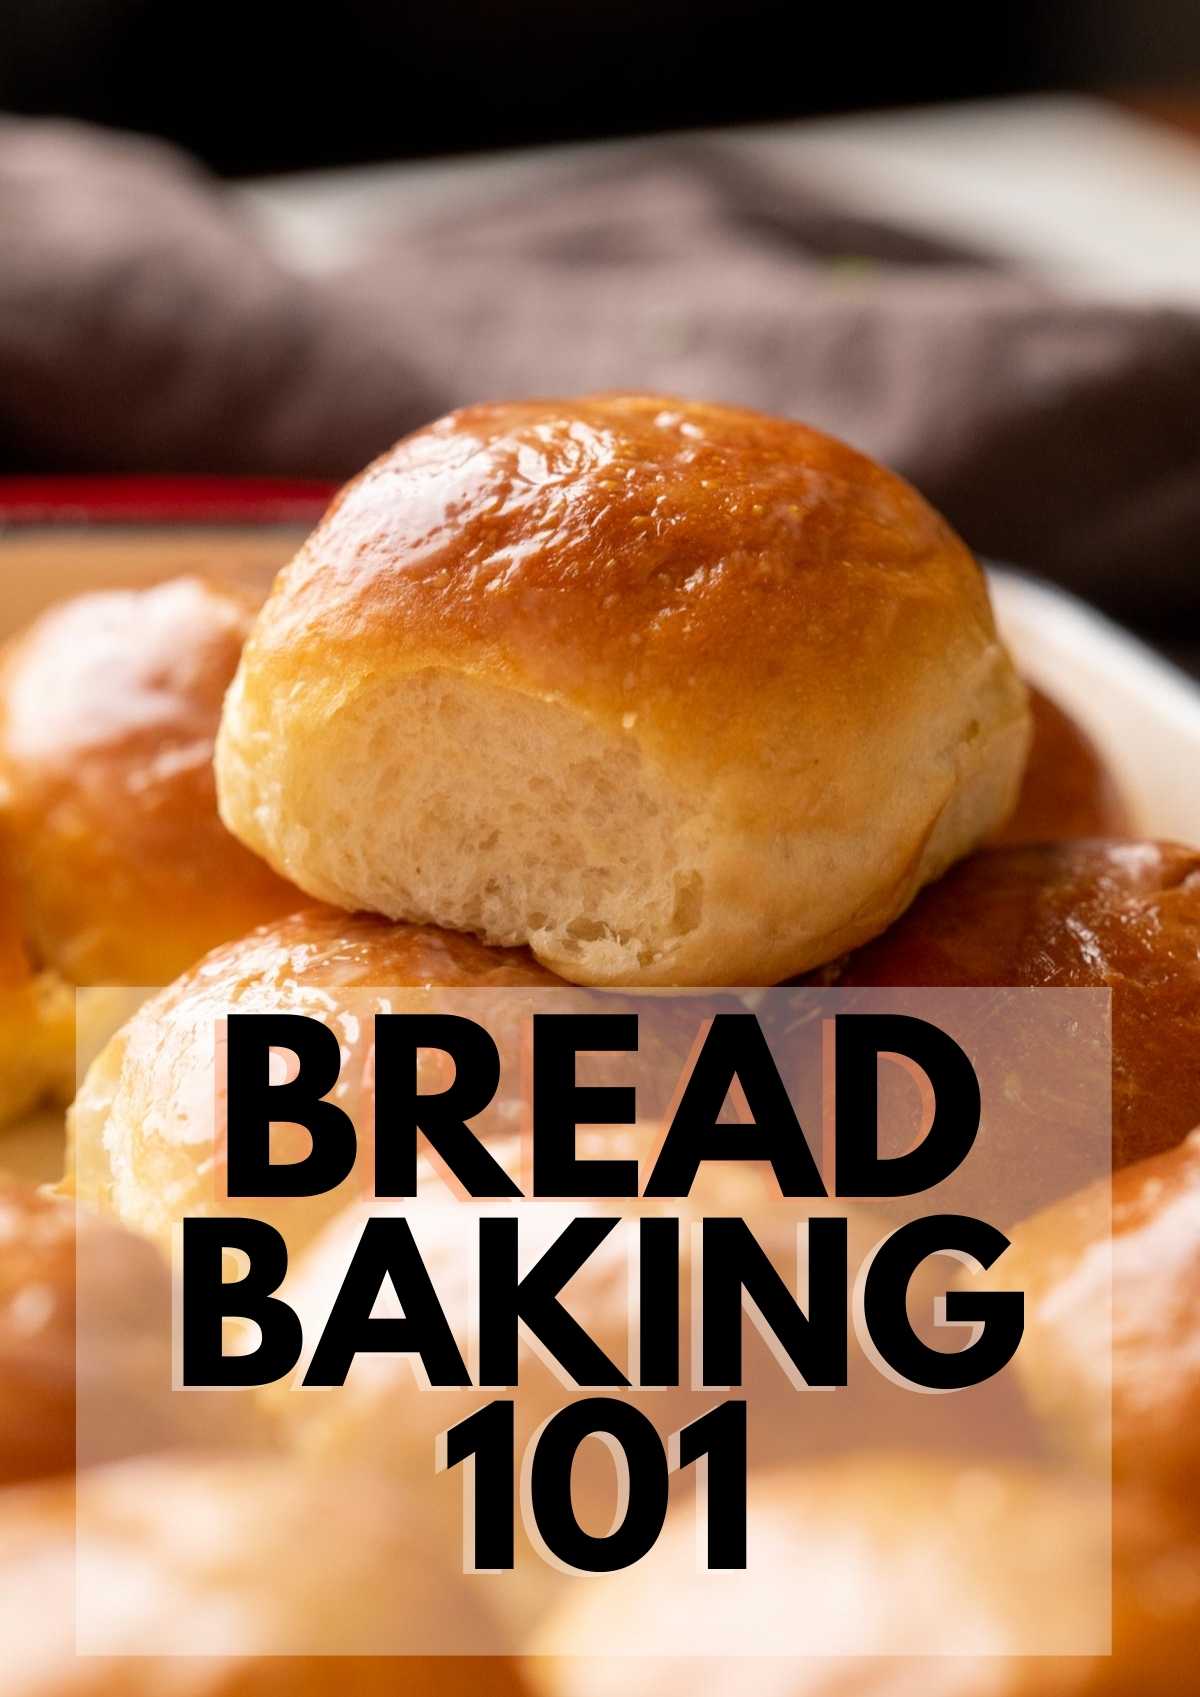
Baking bread at dwelling is among the most satisfying issues to do. However the entire course of may be intimidating if you’re a beginner. So let me break bread baking phrases and ideas down for you. I am additionally together with some ideas, methods and FAQ’s that may provide help to crack this magical artwork of baking bread.
Step #1 Kneading
After you have all of your elements measured and able to go, we are able to start the baking course of. Step one is mixing and kneading. First you mix the respective elements to kind a single unified mass. Then you definately proceed to kneading this mass right into a nicely shaped dough.
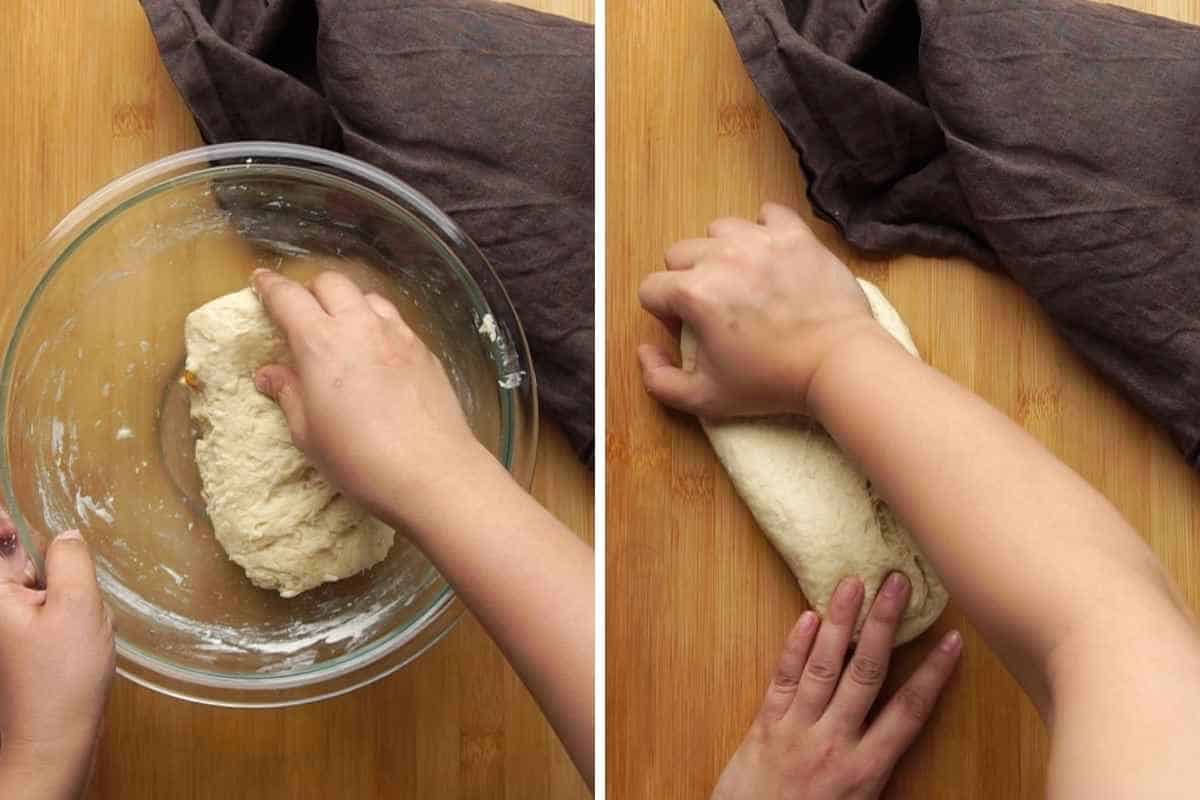
Kneading requires you to stretch and fold the dough a number of occasions in a rhythmic method. You should utilize a stand mixer with a dough hook hooked up or just knead by hand. This course of permits the gluten to develop and evenly distributes the elements all through the dough. It’s important to make sure the gluten varieties sufficiently earlier than permitting the dough to relaxation.
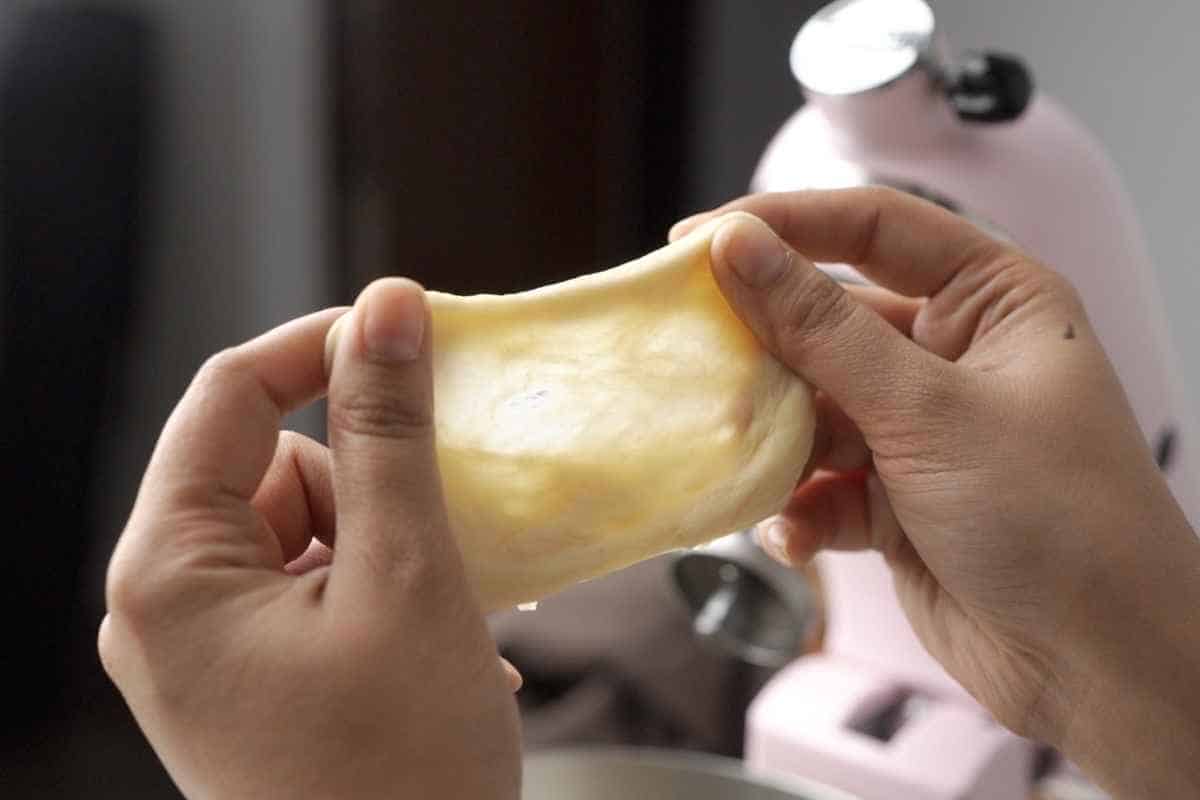
However how have you learnt when to cease kneading? This is how – once you stretch the dough, it ought to kind web-like patterns with out breaking. That is an indicator that your dough is prepared for proofing. One other surefire approach to test this might be the WINDOWPANE take a look at!
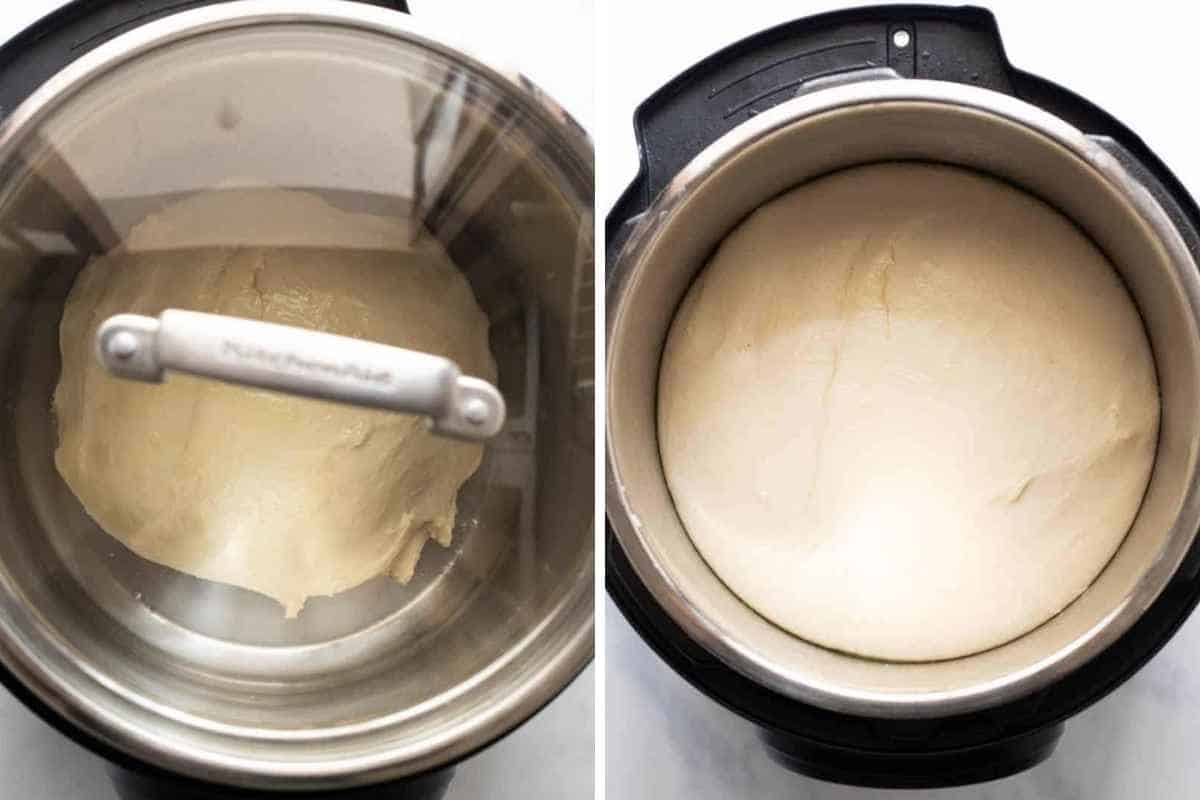
Step #2 Rising and Resting
I’m going to clarify what it means when a recipe says, “permit dough to rise.” In easy phrases, this implies to let the yeast and sugar current within the dough to react and produce carbon dioxide. This carbon dioxide inflates the dough permitting it to “rise” or develop into greater in measurement. This course of is known as bread proofing or proving. Whereas it’s impacted by the standard, amount of elements, and the strategy of kneading and so forth., there are nonetheless three most important situations that impression the dough rising course of.
Humidity, temperature and yeast are the primary situations you should test for those who’re making bread. If these should not optimum, the outcomes will not be what you need them to be. Earlier than setting your dough apart to relaxation, contemplate the form you need your bread to be. Some recipes require double proofing – as soon as earlier than shaping and as soon as after shaping (for instance, brioche buns normally require a double proof). Easy dinner rolls require you to first form the dough after which permitting it to rise.
Professional Tip: Do you personal an Prompt Pot or an electrical strain cooker? I’ve a weblog put up devoted to proofing bread in an Prompt Pot utilizing the YOGURT operate. Belief me, you’ll be shocked with the outcomes!
The query I get most about bread baking – is why received’t my bread dough rise? Let’s first focus on why this occurs.
How have you learnt when the dough has risen?
Permit the dough to double in measurement. Bear in mind the time it takes will rely on the humidity and temperature of the ambiance, so it’s going to fluctuate accordingly. Guarantee it doubles in measurement earlier than shaping and you will be good to go! Some doughs are straight formed and allowed to proof however the rule stays the identical.
Whenever you put aside the dough to rise, there are some things to recollect:
- Grease the bowl through which you place the dough. You should utilize any impartial oil to do that. This can make sure the dough would not follow the bowl.
- Grease the floor of the dough as nicely. This can forestall it from drying out on the highest.
- Cowl with a humid material. This traps the moisture contained in the bowl creating the humid setting that’s required for the dough to rise.
A straightforward hack for this might be to make a mark on the container earlier than you set it apart to rise. This can make it simpler so that you can decide how a lot the dough has risen.
When you reside in a chilly place, I counsel masking the dough with a heat moist material and putting it inside an oven preheated at 50C. You don’t have to maintain the oven on, simply preheat it and change it off.
Bread Dough not rising?
I’ve frolicked understanding the science behind this course of, and I used to be shocked to see how easy it truly is. That is what I discovered:
- Previous Yeast/Yeast isn’t energetic anymore – Yeast is the primary ingredient answerable for making the dough rise. So step 1, at all times guarantee your yeast is energetic. Here’s a useful information I discovered on-line you should utilize to test in case your yeast is energetic.
- Feed your yeast – Yeast wants meals or glucose to work. Principally sugar after which flour and/or milk. All these elements comprise glucose in some kind and that is why yeast and sugar are the primary elements mixed collectively. By no means mix yeast with salt to start with which creates a hindrance and might kill yeast.
- Temperature – For yeast to activate and do its factor, it wants sure atmospheric situations. One being the temperature. The best temperature required is 80F/27C – 90F/32C. To create this, at all times permit the dough to rise in a heat spot – perhaps the oven with solely the sunshine on or close to the range or window through the day.
- Humidity – The second situation is getting the humidity proper. The quantity of moisture or humidity current within the ambiance will inform how lengthy the dough takes to rise. Generally, a bread dough requires 60 to 80 % humidity stage. To create this, at all times cowl the dough with a heat moist material.
Professional tip: When you’re doing the oven technique for proofing your bread, one other approach to create humidity could be to position a bowl of boiling water on the ground of the oven and instantly shut the oven door. The new steam trapped inside will give your dough a moist setting!
Shaping
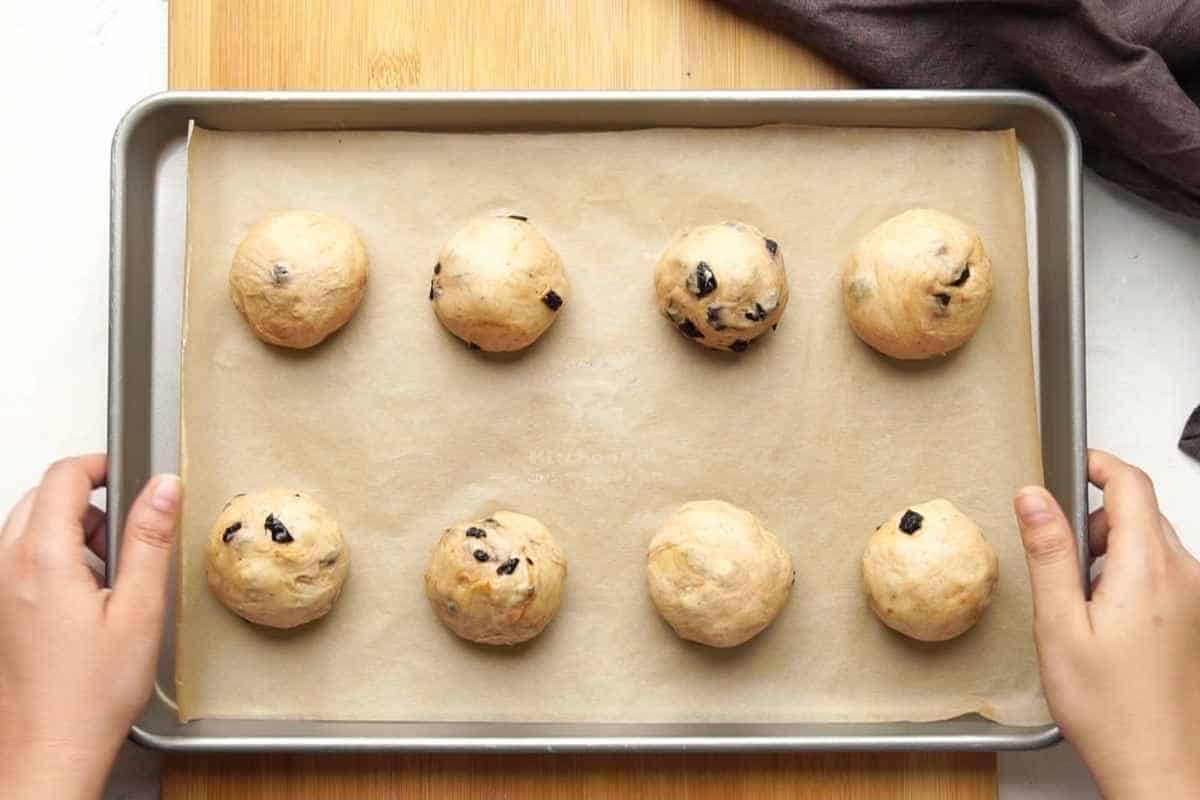
Now in the case of shaping, I follow the simplest one – making a dinner roll. I am no skilled in the case of making insane designs with bread trigger I most frequently bake these for household. All I do is divide the dough into small parts and roll them into a decent ball.
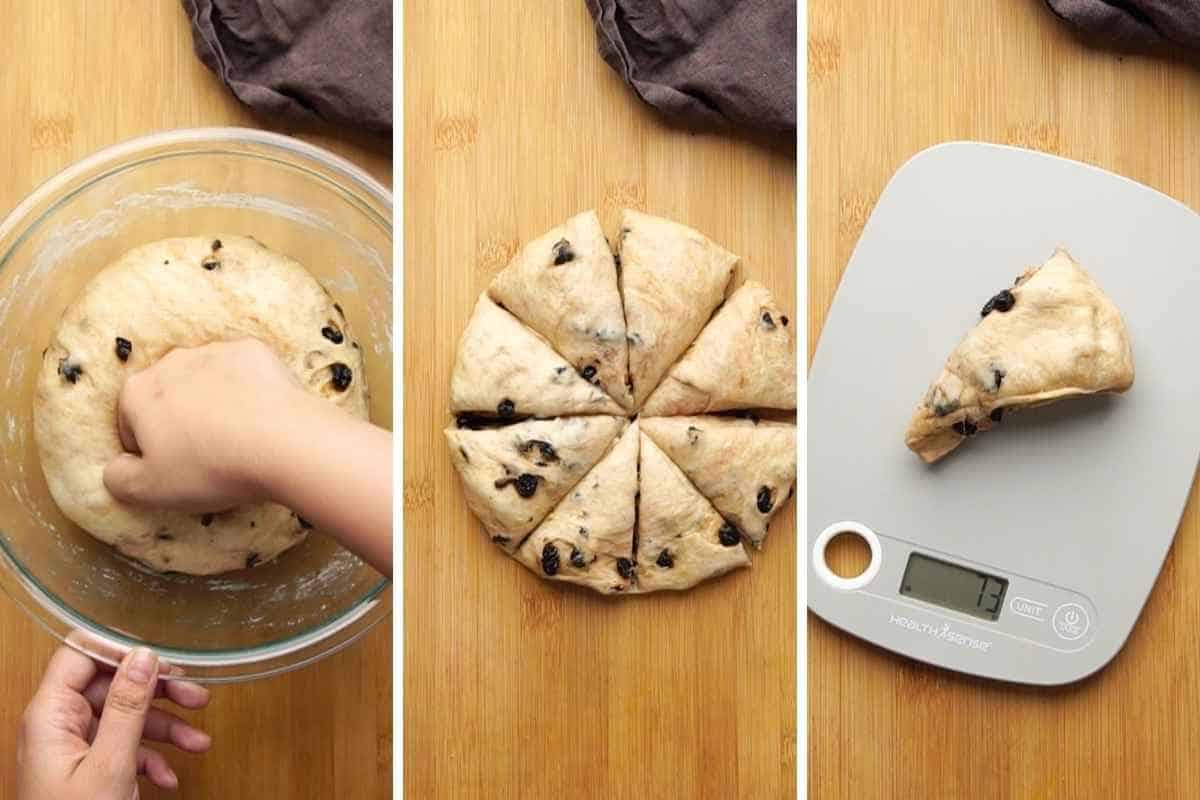
There are nevertheless many designs you can also make with dough, braid it, and form it into scorching canine or burger buns, that is as much as you and the recipe! Simply keep in mind that most bread recipes require a second proofing as soon as formed. Make sure you test this earlier than baking.
Baking
PREHEAT YOUR OVEN!! This cannot be pressured sufficient. This can be very vital that your oven is scorching and on the proper temperature earlier than you place your dough in. There’s a course of known as oven spring that happens once you put your dough right into a scorching oven. The warmth of the oven causes the dough to shortly rise as quickly as you place it within the oven. This rise permits the dough to unfold sufficiently because it bakes providing you with a lightweight ethereal bread. In case your oven is not scorching sufficient, then you’ll be able to find yourself with a flat and exhausting bread.
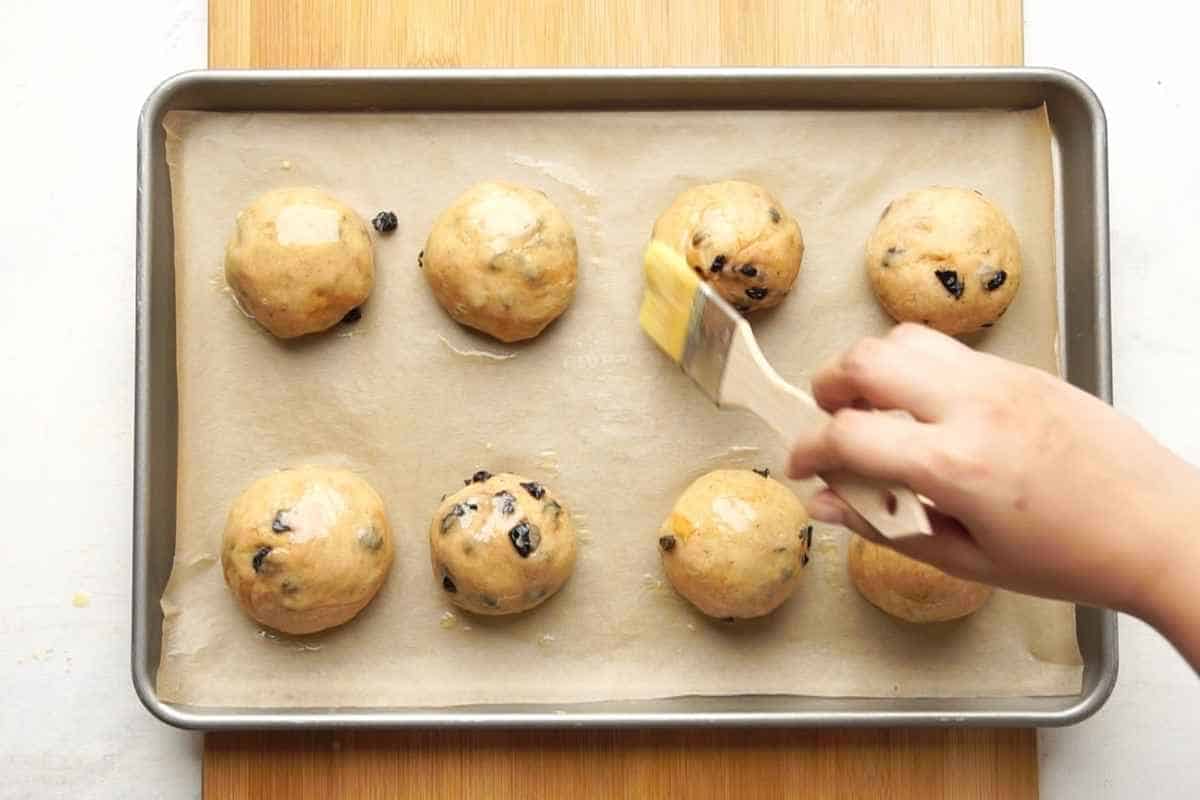
You may brush the dough with milk or egg wash earlier than baking. The glucose current within the milk or egg wash caramelises whereas baking. This offers bread that lovely golden brown sheen on prime!
Listed below are a few of my favorite bread recipes so that you can attempt – Dominos Model Garlic Breadsticks, Eggless Dinner Rolls/ Pav and Pepperoni Cheese Bombs with the softest bread!
[ad_2]